A pincushion and two pouches for starters

My journey with the Adult Learning classes here in Newark continues, I’m currently attending the Machine Sewing for Beginners class for bags, and while I’m not a beginner with my sewing machine, I am new to bags. I also want to up my skill levels on putting in zips and buttonholes and as both of these are covered in the 6 week course, and knowing how good the courses I’ve been on so far have been, I signed myself up.

This is actually my third course - I started with the Gelli Plate Printing class and then quickly followed that with an Indian Block Printing and Stitch course, which was amazing and I’m hooked on printing onto fabric. I’ve not shared much of that yet, and none here though you may have seen some on my Instagram feed and stories, but I have so much to share from that one, so keep an eye out for that.

The bag making class is small - there’s just five of us and the tutor, and the skill level is mixed which is something I anticipated when I signed up. However there is still much to learn, especially as I’m using a machine provided by the course which is a newer model than mine and has a top loading bobbin which I’d not seen before, and it’s also nice to spend time with other people doing the same thing.

It’s also been hands-on too, some theory obviously, but not overly so. In fact the first week we all left having made a pincushion, so that was nice. As I wasn’t sure what it’d be like or what we would start with, I decided to take along fabric that wasn’t at the top of my favourites list, and that which I’d probably not rush to use.

And so that first week I made a Christmas pincushion, like you do!

A light grey square fabric pincushion, the material has snowflakes arrows and reindeers in red, green and brown line drawings - and there's a large red button at the centre

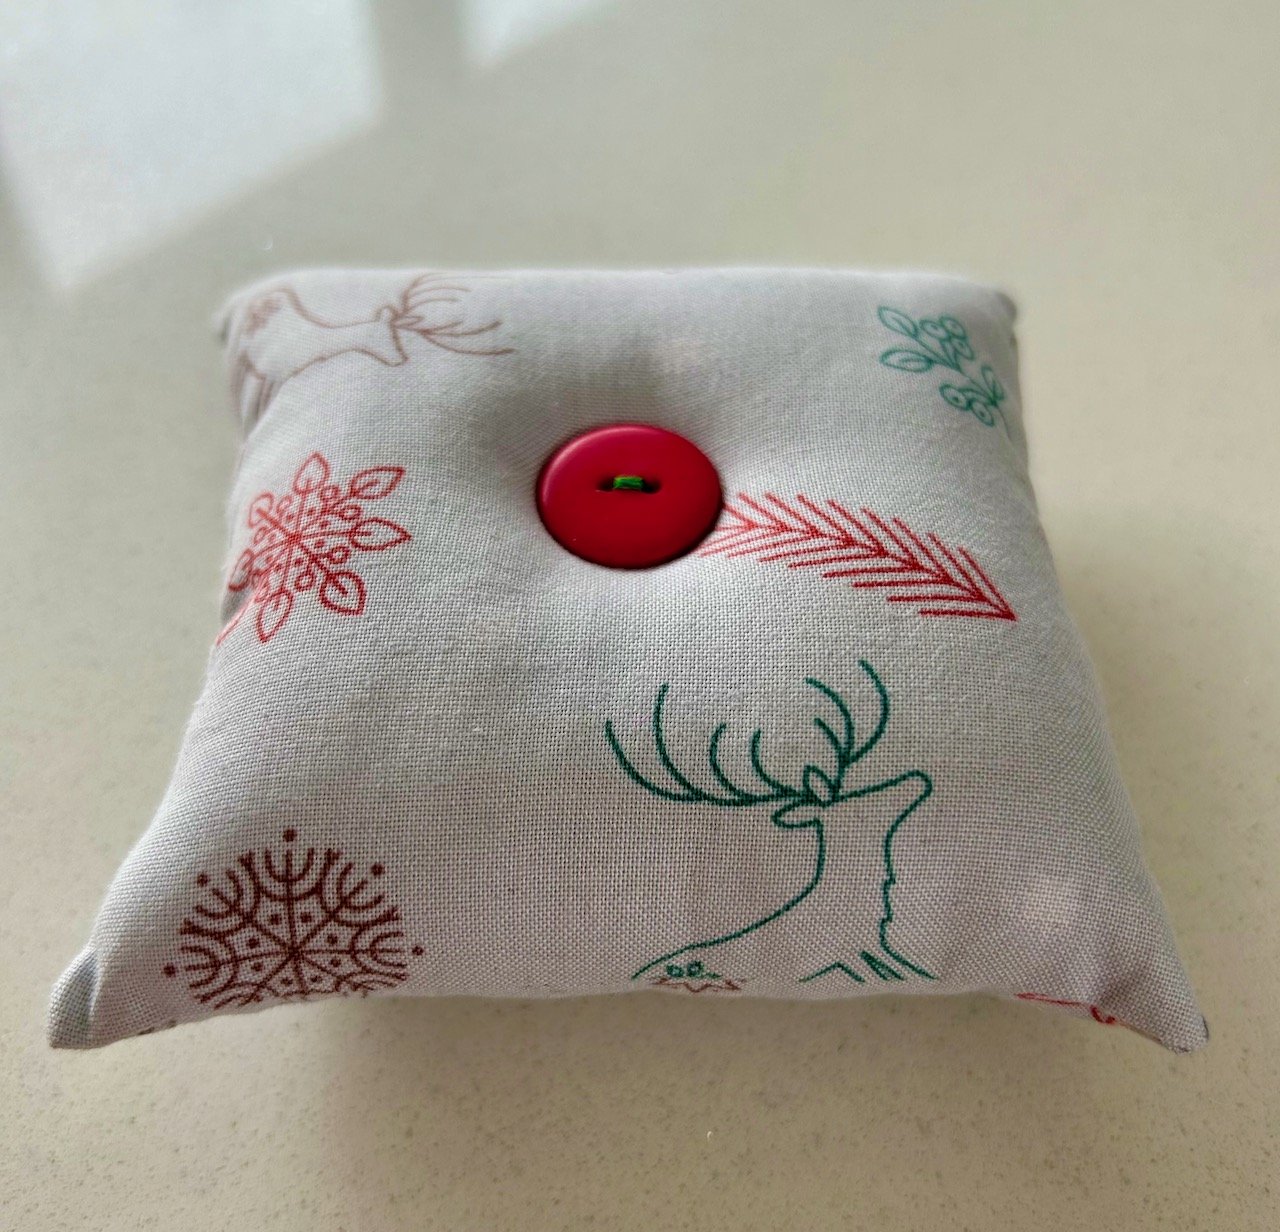
I’d misjudged the seam allowance on the new-to-me machine and only realised once I’d turned the pincushion the right way through, which meant that hand sewing the closure was more tricky than it needed to be and therefore it wasn’t as neat as it could have been.

That annoyed me in a minor way, but later on I realised that I could pimp up my pin cushion and make it even more Christmassy by adding a simple red and white twine around the edge. The ‘twine’ I used is actually paper (but quite solid) which I’d saved from Christmas presents last year!

the same pincushion as the previous photo, now with orange and green pins pressed into the top and a red and white trimming around the seamed edge

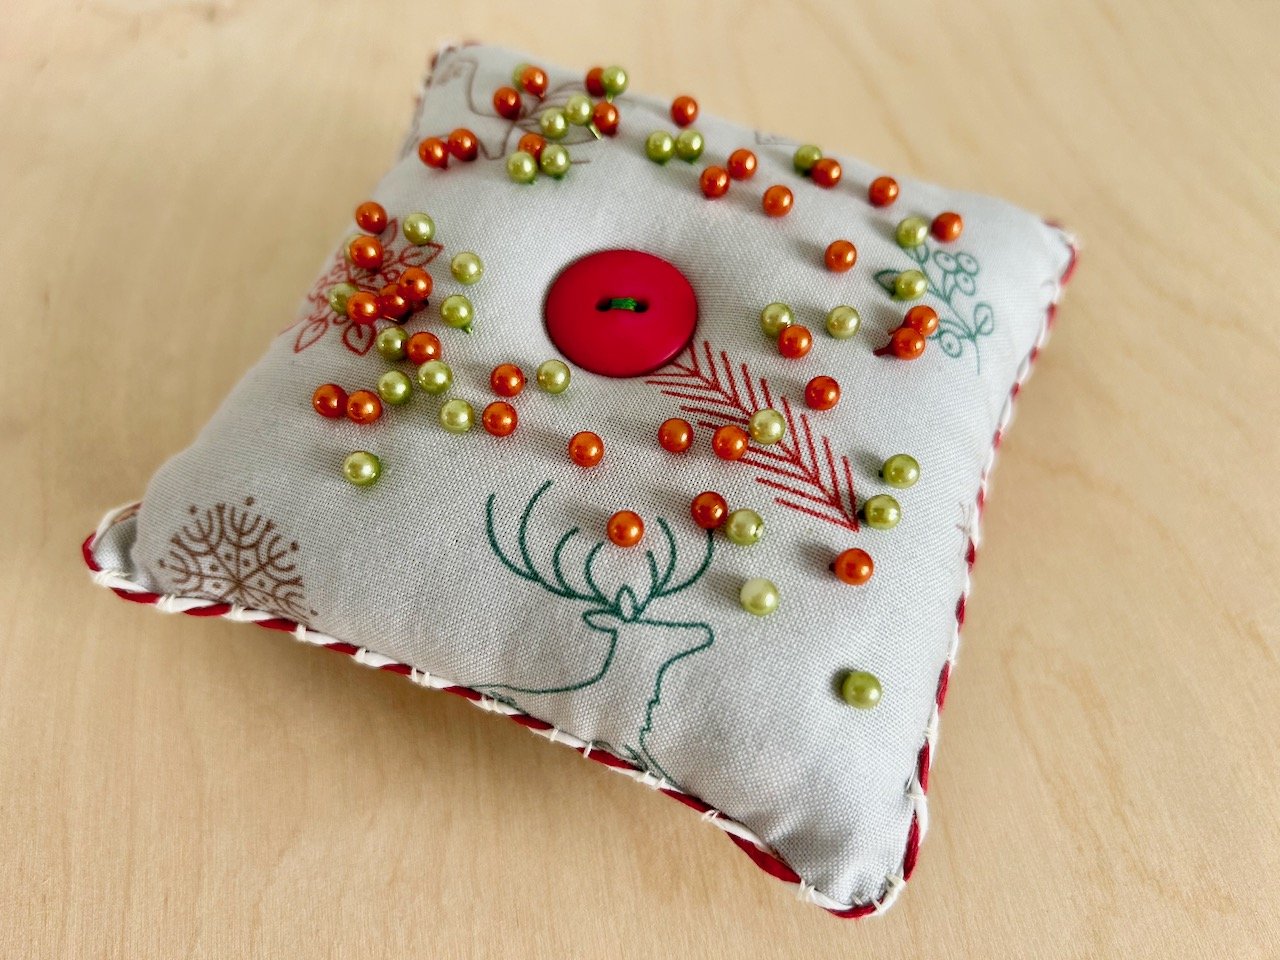
There was nothing wrong with it before, but I’m much happier with it now!

Next up it was a simple pouch, and for this we needed two pieces of material - outer material and lining - approximately the size of an A4 sheet of paper. While I had my B team material to choose from, I also had something else in mind. It was a bit smaller than needed but as this sort of pouch can be flexible on size I decided to go for it, and left with this completed pouch.

A cream pouch with black and white printed detail and a purple popper

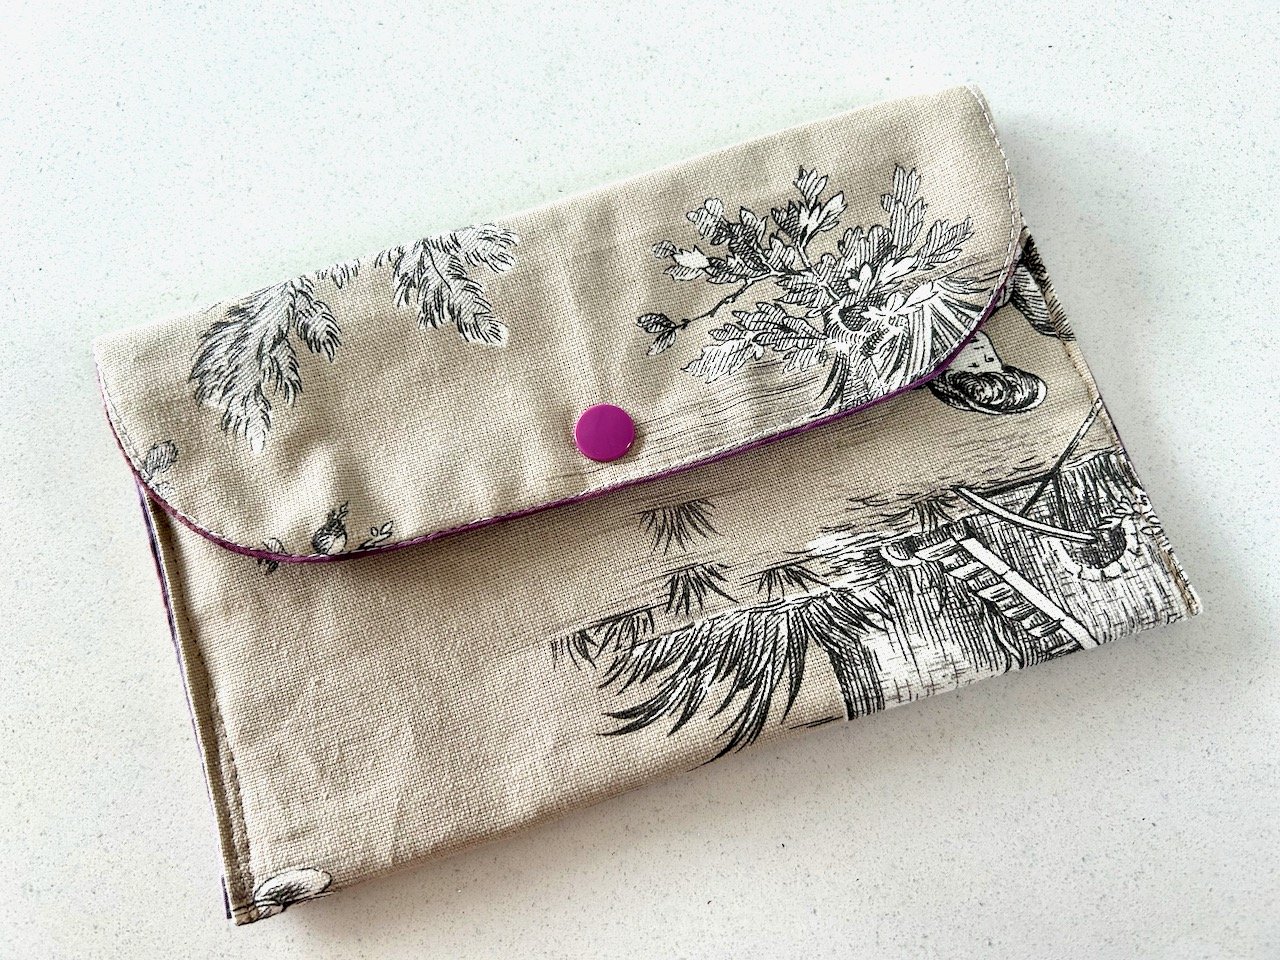
I’ve not made anything like this for a long time, and this was easier than I remembered. As the tutor said she’s a big fan of straight line sewing, and this is mostly that - and the purple popper sets it off nicely too, and complements the purple batik lining (which was firmly in my B team fabric list).

There was one part that I wasn’t entirely happy with (again) - if you look in the bottom left hand corner you can see the sewing is a bit wild where I started off and revved the machine a little too much and off it went! It was a shame it was on the plain background of the material, had it been on the other side in the pattern I don’t think I’d have noticed it quite so much.

But I wasn’t undoing it, this was a practice pouch and it still worked perfectly well.

Then I realised I had some ribbon that was very similar to the background colour, so I dug that out and added an embellishment in that corner, front and back.

The opened pouch showing purple batik lining, and the addition of a toning trim in the bottom left hand corner

Now it looks as if it was always meant to be there, and I’m much, much happier.

I also got to start another similar but different pouch - one that’s ideal for sunglasses, and as I didn’t have sunglasses case it was perfect for me. I choose A team material for the outside, and again B team material for the lining. There’s nothing wrong with the lining material, but I think a lot of what I’m calling my B team materials just look better in small doses!

The same pouch as the photo above, this time with the flap open to show the lining - navy with a green/blue and white/brown checked design

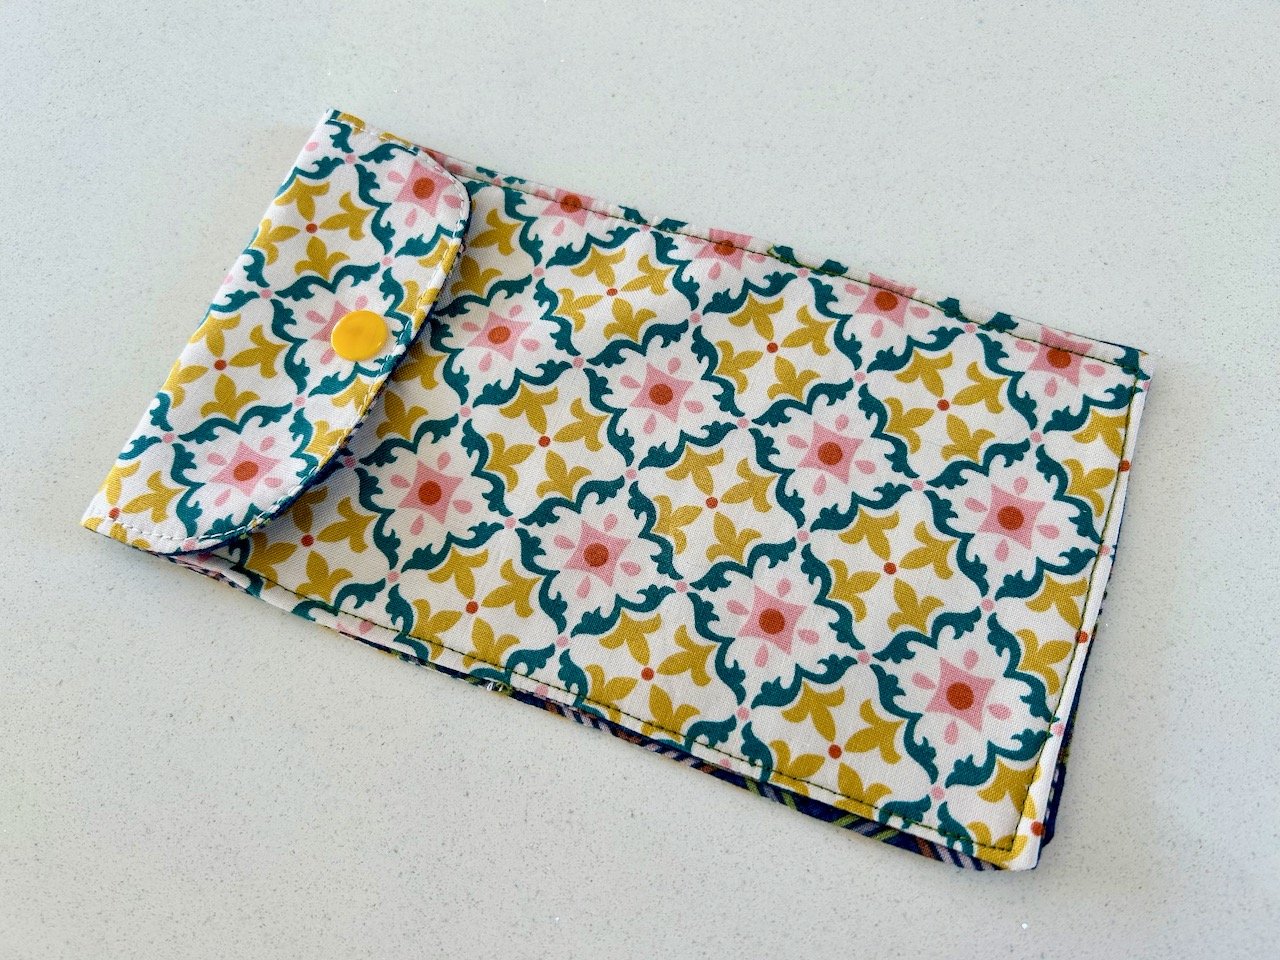
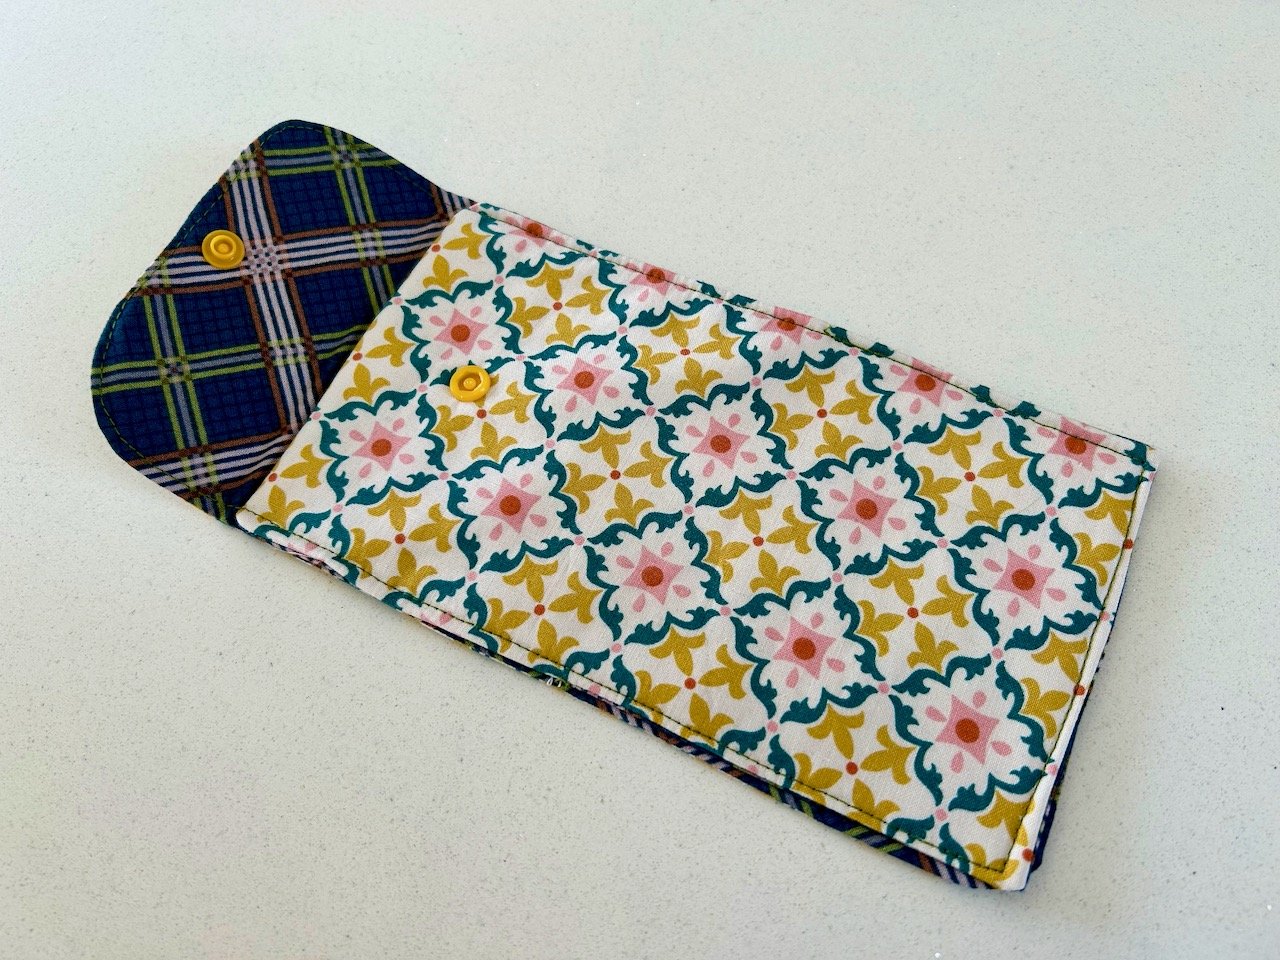
The outer material reminds me of Portuguese tiles, and the lining of a man’s shirt from the 1970s!

And for a change this one hasn’t been pimped up, I finished it in the third week of the course just as the sun decided to make an appearance (at last!) - so I couldn’t have timed it better!

Using my Gelli Prints

While creating the gelli prints is good fun, and slightly addictive, I knew that I needed to actually use them or otherwise you’d find me under several reams of them, and before long I’d probably need rescuing! The last class on the course was all about turning these wondrous prints into even more wondrous hand crafted items, and I left with quite a bundle of handmade items, some of which I probably wouldn’t have thought of or tried at home:

Using the gelli prints on (clockwise) a handmade notebook, a card and two bookmarks

A HANDMADE NOTEBOOK, A CARD AND TWO BOOKMARKS - THE GELLI PRINT WAY!

Though I was rather pleased with them, and I’m already using the bookmark with the orange tag in my book - and in case you’re wondering the orange tag is repurposed from a Superdry tag. I can definitely see that I’ll be using scraps of gelli printing alongside many other items I’ve saved for crafting - and I’m already wondering how small is too small for saving these scraps!

But anyway, inspired by the series of four classes I took in Newark and knowing that if I just put this to one side it would probably stay there for a while, I wanted to set about creating some more cards. I’d already toyed with strips of gelli printing and liked that so wanted to try blocks as backgrounds, with a design on top.

SIX pink/peach gelli print blocks with a gold and black floral design over the top on a white background

Both of these cards use the same concept but have turned out very different - and I like them both. I used a stencil for the outline of the floral and meadow designs and then adapted these, so they’re less stencil-like, using my knowledge of plants and flowers.

Six pink, white and blue gelli plate blocks arranged on a blue card with a meadow scene in black and highlights with pink and blue on top

And didn’t they work out well?

I wanted to try using some of the smaller scraps, and so that’s where gift tags came in. I think these were also successful and I used some scrap ribbon on both, and those black diagonal stripes - well they’re old dymo tape that I found in one of my many craft room boxes.

Two gift tags using scraps of gelli printing, some ribbon and washi tape (on the left hand tag) and dymo tape on the right

These three gift tags were originally intended as a card, however I realised my knowledge of birds is lacking and one (now cut out and discarded) wasn’t right at all. Not wanting to lose all of my work I repurposed these further making gift tags and adding ribbon saved from Christmas crackers many years ago as ties - and I’m not sure you’d know if I’d not told you.

A gift tag to complement the card - both use green, yellow and orange gelli printing.  The card also has scraps of ribbon and paper, a strip of map and a button

My final make was again to avoid throwing away small scraps leftover from the card - and another gift tag. I think I could quite get into having coordinating cards and gift tags, though I’m not sure anyone other than me would notice!

I just know that there’s so many more uses for all of the gelli printing I already have, let alone the ones I’ve yet to print. I’m also pretty sure that this new craft is here to stay!

PostCommentLove

Creating plaids with gelli plate printing

In my previous post on learning to gelli print I shared how to print using stencils and shapes. Today I’m sharing how to create plaids, which I think is one of my favourite approaches so far. As with gelli plate printing generally, it’s quite random - so if you’re a perfectionist or like things measured exactly this may not be the craft for you. However, if you’re happy to go with the flow and see how things turn out, then I think you’ll love it.

I ended up with three plaid designs from the class which I’m sharing here, but this is something I will try again as it’s great to see how it’s going to turn out.

To create plaids you need more paper

It’s simple really, but you need to cut lengths of paper in the width you want, or varying widths to create your horizontal and vertical stripes. First you work the ‘stripes’ one way, and then the other, laying them on the gelli plate and working quickly as is the gelli printing way, so that your thin layer of paint doesn’t dry on the plate.

The results can be pretty spectacular, and you can reuse the extra strips of paper as many times as you need to to get the design you’re after. And even when that’s done, the strips of paper will be covered in their own unique colours and can be used for example in card making - the possibilities are endless.

Red and pink plaid created with gelli plate printing

Though that’s the danger I’ve found with gelli plate printing - I’m keeping more and more pieces with the view that I could use those ‘one day’ - a bit like you do, or well I do anyway, when cutting out fabric. And how small is too small, well one thing’s for sure and I think they’re probably different sizes for fabric and paper, just don’t get me to commit to what that is for either of them!

Experimenting with colours

You only have to Google ‘colour wheel’ to discover the theories and relationships between colour, and how you can use primary, secondary and tertiary colours, and I’m not about to explain that here, you’ll be pleased to know. But after trying the complementary colours above, I wanted to try something bolder for my next print - and I think the blue works with the reds and oranges, don’t you?

Orange, red and blue working well (despite how it sounds) for another gelli plate printing plaid

Using up those misprints

This is a great way to use, or reuse those prints which didn’t quite work the first time as you’re printing over the top adding more paint and therefore more interest as you go.

In the image below my starting point was a very patchy yellow print, but by adding vertical and horizontal stripes in reds and oranges I’ve created a pattern that I really like for it’s ‘distressed’ look, and which I know I’ll find plenty of uses for in my paper crafting days ahead.

A more distressed plaid with less full coverage using yellow, orange and rust coloured paint

Here I’ve only scratched the surface of the many, many combinations and patterns this technique can create - but as a taster I think you can see that it’s one that’s intriguing and has the potential for further exploration when I set up my gelli plate at home.

Yes I succumbed and bought my own gelli plate - it was inevitable really wasn’t it?