You will never want to leaf

* I was invited to the press preview for and provided with a pair of tickets to Gardeners’ World Live so I’m marking posts from the show as 'Ad’ - as usual my views and opinions are very much my own. Be sure to check out all of my posts from the show.

The banana plant we saw recently at the Newark Garden Show reminded me of this beautiful border at last year’s Gardeners’ World Live, and once I dug the photos out I had another mixed smile and groan at the garden’s cheesy title. The theme for the Beautiful Borders at the show was ‘My Garden Escape’ and I think I’d quite happily escape to this garden, despite the cheese, and who knows maybe I wouldn’t want to leave…

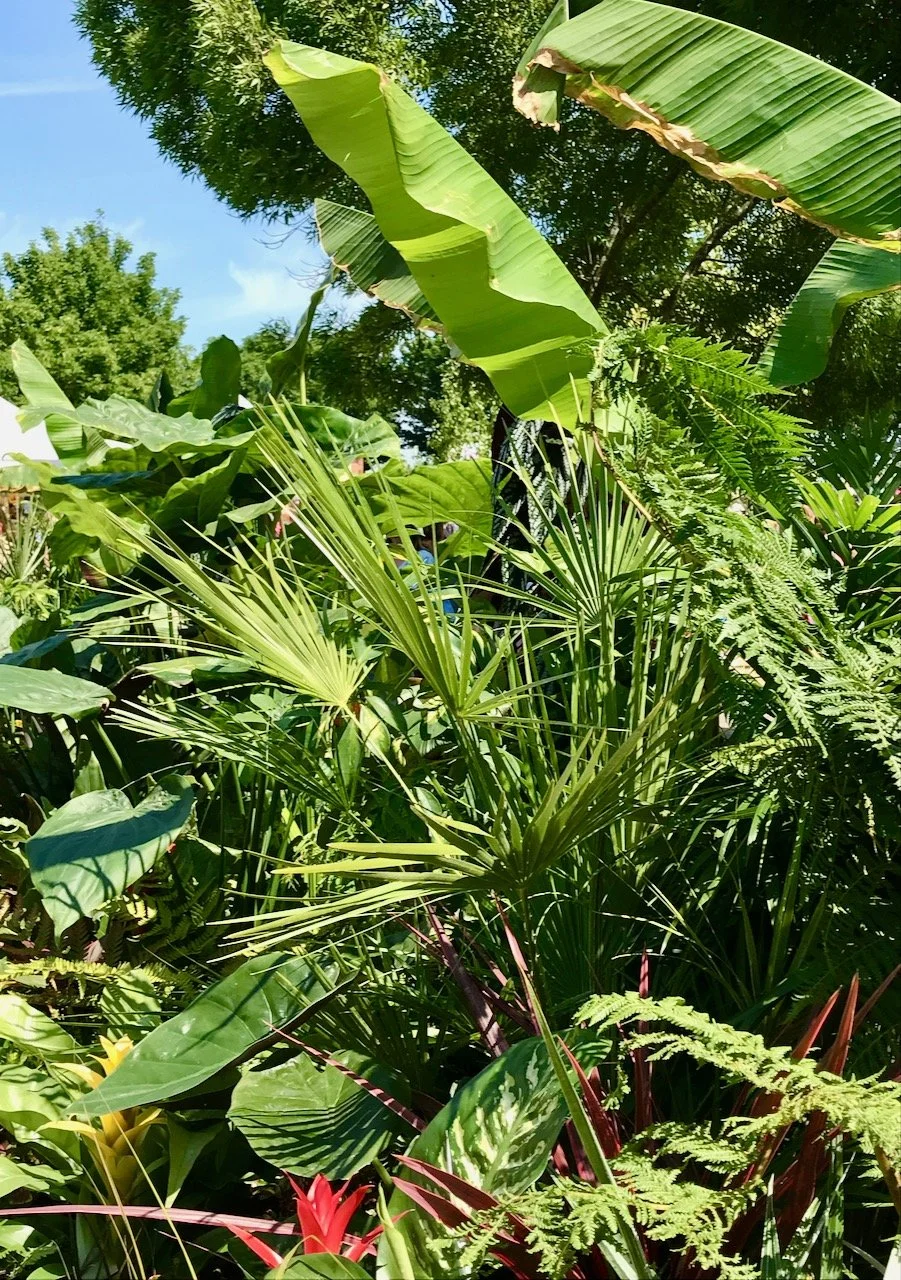
This garden, designed by Kiran Vaidya, invites us to escape to our very own slice of tropical paradise. By just using foliage the garden shows the versatility and variety of leafy plants ‘whilst highlighting the important role of greenery in relieving stress and promoting positive mental health, especially in urban communities where access to green spaces is limited.’

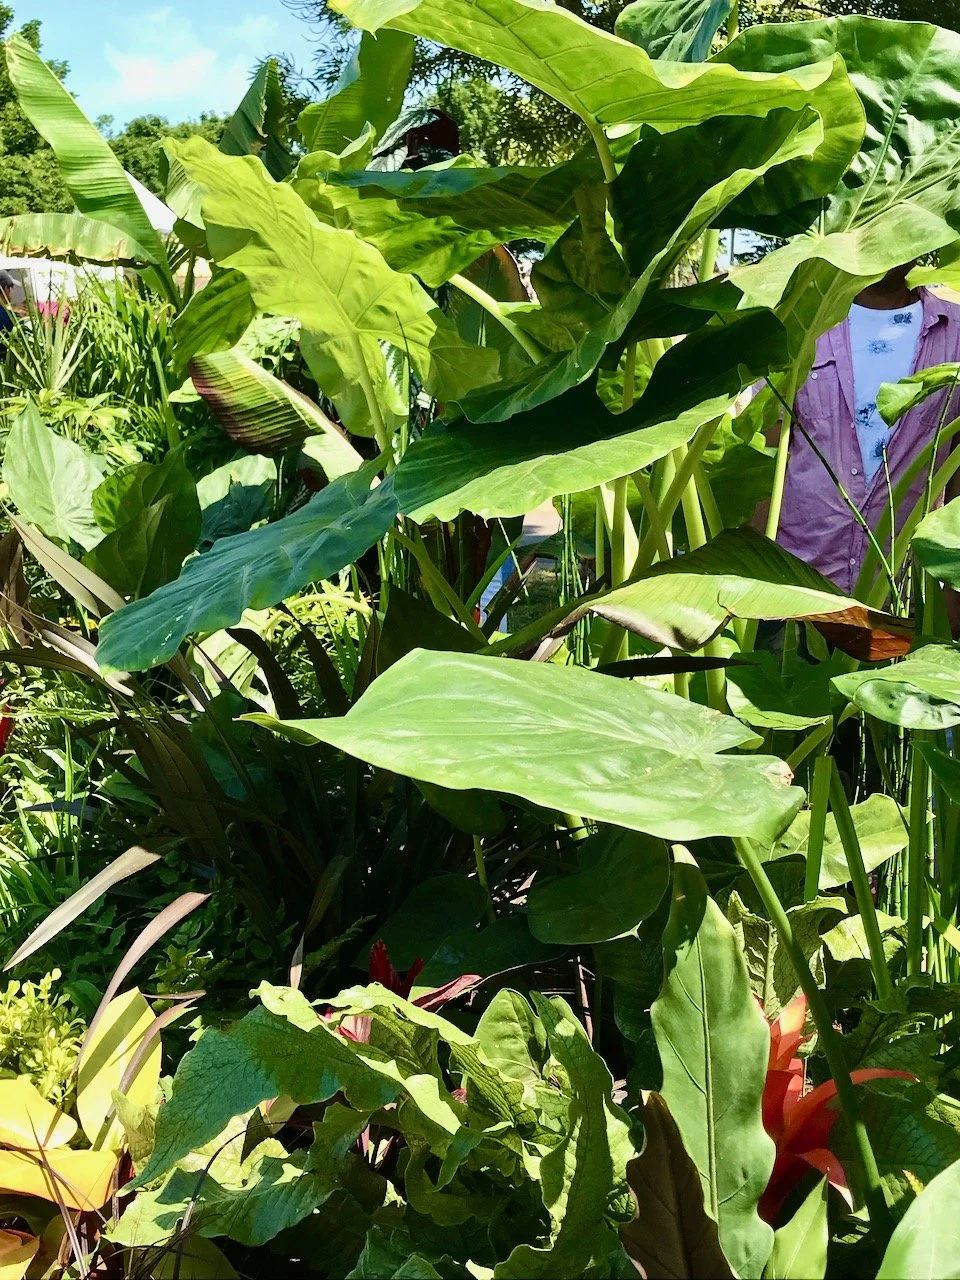
And I don’t know about you, but just looking at these photos makes me want to breathe more deeply and breathe in the fresh air. In my mind’s eye that breath is cool, but not cold and warm enough to be comfortable.

variegated tropical leaves under a tree's canopy

I love the textures and colours that you can get through foliage, along with the drama. Though of course having these plants in your garden is likely to come with the need for additional care and attention over the cooler months, but I can’t help but think it’d be worth it.

* With thanks to Gardeners’ World for inviting me to Gardeners’ World Live, it was as fabulous as ever!

It's a rainbow wrap!

It’s been a while since I shared my rainbow squares on here, 2020 in fact, so quite a while! But I recently rediscovered them, and thought that it probably wouldn’t take me too much effort to finish this project off, and if I got my skates on I could take it on my travels next month.

After this post I shared a layout post on Instagram, convinced that I’d nailed the layout and I’d ‘pinned’ it together with stitch markers to save me having to remember what I’d decided on, which was helpful.

THE ORIGINAL LAYOUT

But the more I looked at this layout, the less convinced I was. And then I realised that with a simple switch I could have a different look - and well, there was no harm in trying was there, if I disliked it I could switch it back again as it’s not like I had attached them permanently.

And so I took the yellow and green ‘ends’ and switched them into the middle:

switching colours - now blues and purples at the top, to greens, yellows and ending on pinks

For me this layout just popped, and just this small change made me feel instantly better about the whole thing - and more importantly, it made me want to finish it. Isn’t colour a strange thing?

Anyway to finish it I needed to permanently attach the squares to each other, I’d initially thought I’d do that sewing them together rather than by joining as per the vintage pattern and crocheting. But now that I’d come to actually join them, the sewing together option was a non-starter; I didn’t have leftover wool in each colour and I’d lose some of the laciness, so it was back to the quite sparse instructions in the vintage pattern, and working out a new plan.

That new plan involved a new purchase

I thought about a white or a silver, but neither grabbed me when I tried those colours alongside my rainbow squares, so I checked out my usual online wool shops and got lucky. This ‘skyfall’ colourway from The Wool Kitchen is a perfect match to the original wool which came as part of the mini-skein club by Vicki Brown Designs.

The new grey & multi colour flecked addition laid in the middle of the yellow and green squares

With a bit more head scratching, lots more ‘pinned’ stitch markers and a bit of trial and error I worked it out, and quite quickly the short lengths and then the longer lengths were attached to each other.

My rainbow squares attached to each other with a light grey chain stitch

ATTACHED!

A CLOSER LOOK AT THE JOIN

It already looks so much better than I could have imagined - and there’s a real chance I may just finish it soon too. I just need to add a row of double crochet around the edge and finish with a row of picot stitches - the pattern for this is just as sparse, but I’m confident it’s within my grasp.

Getting organised with pegboards in my craft room

I’d had my eye on some pegboards for my new craft room since the room itself was a glimmer in my eye! Initially I thought we would make them up ourselves so that they could be truly customisable for whichever space I chose, as it really couldn’t be that hard. And if I had a truly awkward space I don’t think it would be that hard, but once I’d worked out where I wanted to put my fictional pegboards, and once I’d seen the IKEA Skadis pegboards and how flexible they were, there was no other choice for me.

I decided that my pegboards would make the best use of a blank wall inside the small walk in cupboard in my new craft room, which would also be the ideal way to store my quilting rulers. Since we’ve moved, and I’ve unpacked my craft room, they’ve not really had a dedicated space and nor were they all together. But that soon changed!

What I chose: pegboard size and accessories

Our house is a new build, which means there’s a lot of white - and for a self-confessed colour addict, surprisingly I’m ok with all the white, so for me it was always going to be the white version, although the black colourway would also have worked. I opted for two 56x56cm square pegboards, while I did have room for one of the larger size I wanted to keep some space clear, as that’s something else I’ve come to appreciate with our new house - we don’t have to cram it full of stuff, and the same goes for this small walk in storage space.

As I was ordering online I was keen to get the pegboards and accessories in one shop, however I didn’t really know what would work but given that the accessory pack prices were under £5 I decided to chance my luck.

The accessories I opted for were:

  • Two packs of Skadis shelves, £4 each

  • Two packs of Skadis clips, £2 each

  • Three packs of Skadis hooks, £2 each

  • A single Skadis hook rack, £2

  • A pack of 5 Skadis push in hooks, £1

The final addition to my basket was the connector for Skadis pegboards, which was recommended when hanging two pegboards side by side (or in my case top to bottom!).

So for just under £50 I was able to bring a whole lot of order into a space which would otherwise have little use - and now that it’s finished it’s not only useful, but it’s a pretty and practical addition too.

Two IKEA Skadis pegboards joined together and hung inside my built in cupboard - it stores crafting supplies, including craft rulers and shaped templates
My view from the cupboard door - pegboards on the right, and a space between the Ikea kallax unit and the wall

MY SKADIS PEGBOARDS BRING FUNCTIONALITY TO AN OTHERWISE UNUSED SPACE

Even better though I guessed just about right on the accessory front. I used most of the ones I bought - though I did have a few challenges along the way. I naively assumed that all of my acrylic quilting rulers and templates would come complete with a hole to hang them from. That wasn’t the case, especially for those which came as free gifts from magazines, and some which I’ve had for a long time (I reckon I’ve had my Fiskars ruler - the one bottom right in the photo above - since the early 1990s), so the hooks weren’t going to work for those, or at least not in the same way.

Thank goodness for creative thinking though!

I was able to position some of the hooks so that the templates could balance on top of the hooks, and used the clips for the long Fiskars ruler, which I still probably use the most. I realised I had little use for the hooks on the hook rack, but the rack itself was useful to hold more templates.

The trays bring a 3D element to the pegboards, and while I’ve used them to store smaller templates and the hooks I’ve not yet used, I’m not sure if I’d opt to buy these if I were to do this again.

The top half of the board with embroidery hoops and craft rulers and templates
Focusing on the lower half of the ikea skadis pegboard which also holds craft supplies but allows the rulers and templates to hang below the last space

I’m glad I opted for two of the smaller sized pegboards - and the connectors were an absolute gem according to MOH who was tasked to put these on the wall for me. As well as the feeling of space, I can use the whole pegboard making use of the space below as well with the rulers, templates and metal rings I bought to make some crocheted mandalas (one day!) hanging off the bottom.

I’m so pleased with how these turned out, and how it’s made a space that usually wouldn’t be used into a functional feature. And yes, I’m using the rulers and the space is still this tidy!

PostCommentLove